


With the latest technological advancement, it easier to organize your tasks using an application that eliminates the need of using more than one tool for your organization’s workflow.
At The Ops Collective are team uses ClickUp. A productivity platform with a user friendly interface that is fully customizable and works for every type of organization, so all members of the team can use the same app to plan, organize, and collaborate.
With ClickUp, you can access all your tasks, documents, conversations, goals, reminders and more in one place.
If Trello and Asana had a baby, it’s name would be ClickUp. This application takes the best of both worlds and takes it up a notch to make managing clients, projects, and teams a breeze.
To give you an overview on how ClickUp helps you on your project management needs, here’s some project management hacks that makes working with ClickUp even more fun:
1. Customized Dashboard
Dashboards are a great way to build a high-level view of organization’s activities in your Workspace. It allows you to see valuable information such as insight into tasks, sprints, projects, people, and so much more with the use of customizable widgets.
Dashboards help you create your own mission control center for your entire team such as sprint tracking, epics, high-level initiatives, team planning, and literally anything your creative mind can do. You can even add docs, conversations, and embed anything inside of your Dashboards.
With ClickUp’s Dashboards, you can report on data anytime, pull in data from anywhere in ClickUp and turn it onto compelling visual representations, calculate metrics, track progress and much more.
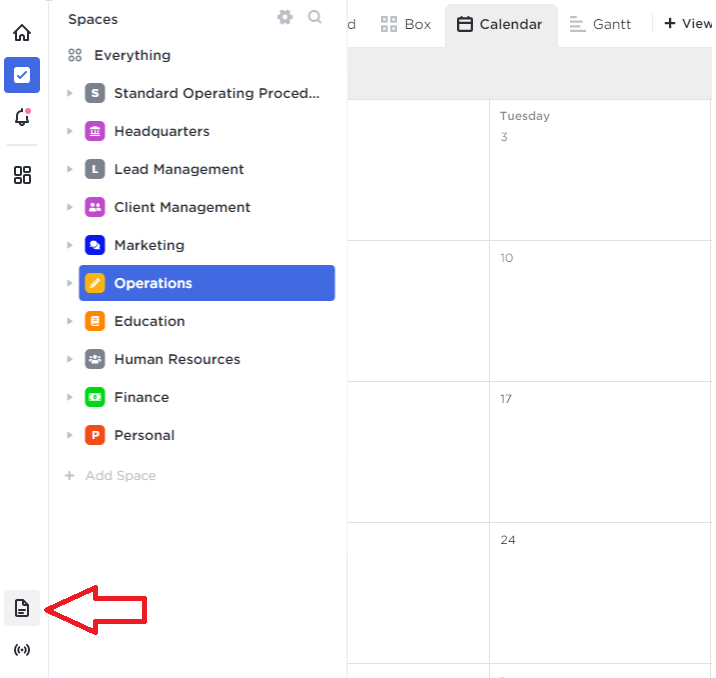
How to Create a Dashboard:
- Click the Dashboards icon in your sidebar
- Click the + to add a new Dashboard
- Click + Add Widget to bring in your data
2. Live and Up to Date Documents
You can create docs, knowledge bases, and wikis anywhere in ClickUp. Each doc can contain an unlimited number of pages, and is flexible and sharable. You can mention members of your team, and even generate tasks within the doc to keep everyone updated. You can even share your docs publicly without having to log into ClickUp, and making them accessible to everyone.
How to add a Doc
There are many ways to add Docs in ClickUp. Docs can either be attached to a location such as List, Folder, Space, and Workspace, or they can be on their own. Here’s the options on how to add a doc:
Option 1. Docs Home
Docs Home is located on your left-hand sidebar. Here, any new Doc you create will be private by default, however, you can customize sharing to “share with individual people”, or you can attach your Docs to views.
To add a new Doc from your Doc Home:
- Click + Add Document
- A modal will reveal a new doc for you to start working on
Option 2. Docs View
You can create a Doc View when you are on any List, Space, or Folder level in your Workspace. Doing this will always attach that Doc to this view. Remember, however, that Docs added to views will always inherit sharing from the location that it’s attached to.
To add a new Doc from your Doc View:
- Click the + View
- Select Page Views
- Choose Doc
Option 3. Task View
When you are in the midst of working on a task, you can spin up a new Doc. Docs created here will be attached to your task and appear in your Docs Home for easy access.
To add a new Doc while working on a task:
- Open a task
- Click Add in the Attachments OR the Doc icon in the comments
- Create your Doc!
You can also embed the link to your ClickUp doc inside your task description window by using “/doc”.
Option 4. Quick Create
You quickly create a Doc from anywhere in your Workspace that will live comfortably in your Docs Home until you’re ready to share or attach it to a view.
To quickly add a new Doc:
- Click the + in the bottom right-hand corner of your Workspace
- Select the Doc icon
- Create your Doc!
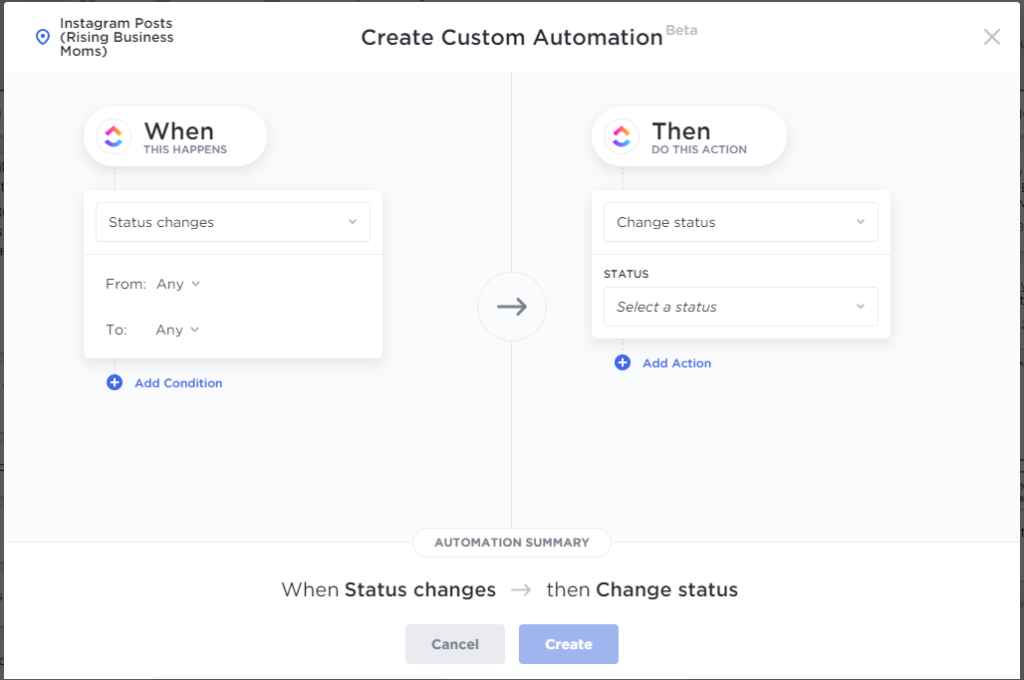
3. Automation
ClickUp Automations helps you save time and allows you to focus on things that matter. You can easily set recurring tasks for yourself or team members so you don’t have to spend time assigning them to your team.
How to Create an Automation:
- Open a List
- Locate the Automation icon next to the List title
- Click +Add Automation
- Choose a prebuilt Automation OR create a custom Automation
- Modify your Trigger
- If on the Business Plan, add Conditions
- Choose your Action – add Multiple Actions on the Business Plan
- Create your Automation
4. Time Saving Embedded Views
You can literally bring anything into your Workspace to save time and reduce context switching. With Embed view, you can add apps and websites alongside your tasks.
How to Create an Embed View:
Embed Via URL
- Click the +
- Select Page Views
- Choose Embed
- Insert a link
Embed Via HTML
- Click the +
- Select Page Views
- Choose Embed HTML
- Add your HTML
5. Custom Fields
Custom fields let you build ClickUp into virtually anything you can imagine. In ClickUp, you can track, sort, and filter work according to your Workspace’s needs.
Creating Custom Fields:
- Click on the ellipses next to a Space, Folder or List
- Select “Custom Fields”
- Click New Custom Field
- Select a field type (field type details below)
- Name your field
Note that you can create custom fields at the Space, Folder and List level, however, each custom field must be unique in its group. For example, if you create a custom field for a Folder, you can’t create the same custom field with the same title in a List nested in the Folder.
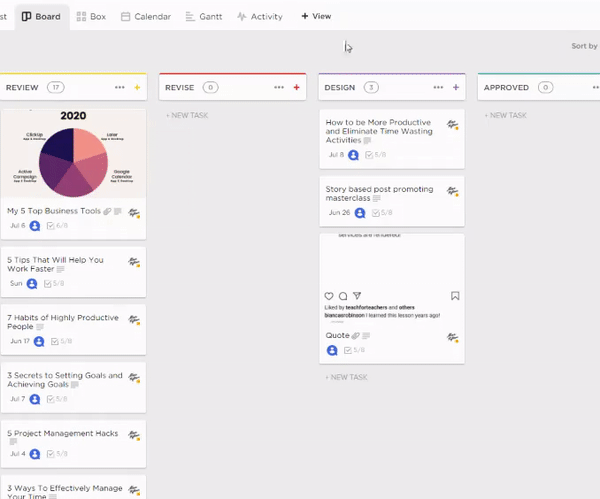
6. Personalized Views
Many ClickUp users prefer to spend their time in either List or Board View because it allows you to plan complex projects all the way down to subtasks, at the same time, it allows you the ability to have a bird’s eye view of all the various projects.
List View
In this view, users are presented with a list of their tasks under a specified Space, Folder, or List. This provides an overview of which tasks need to be completed within each level of the Hierarchy structure.
Within each list, tasks are organized by their statuses, allowing people to see exactly where each task resides within their workflows.
Board View
This is the ideal view for agile teams due to its powerful drag and drop interface. Tasks in Board View are arranged vertically according to status, assignee, tags, due date, or priority.
7. Chat Windows
Real-time chat feature allows you to centralize discussion in one platform. This feature gives you all the same power of attachments, notifications, unfurled task links, and even embedding.
How to Add a Chat View:
- Click the +
- Under Page Views, choose Chat
ClickUp has everything an entrepreneur needs to track deadlines, reminders, documents, communications, goals, and databases.
If you would like to learn more about how ClickUp can you help you save time and avoid the headaches that come with managing a never ending list of to do click here.


")


Comments +